How Do I Create An Assignment?
Assignments are created in Content Areas, but can also be added to Learning Modules, Lesson Plans, and folders. Any instructions and file attachments that students need to complete the assignment are provided at the time of creation. You can deliver assignments to each student individually or as collaborative work for groups of students.
As assignments are created, you will work in Edit Mode. Edit Mode allows you to view all of the instructor functions. In this workshop, the phrase "in Edit Mode" refers to Edit Mode being ON.
Creating assignments in a Content Area
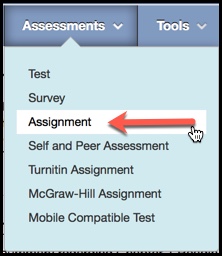
In Edit Mode, access a Content Area. Then, on the Action Bar, point to the Assessments option. From the drop-down list, select Assignment.
On the Create Assignment Page:
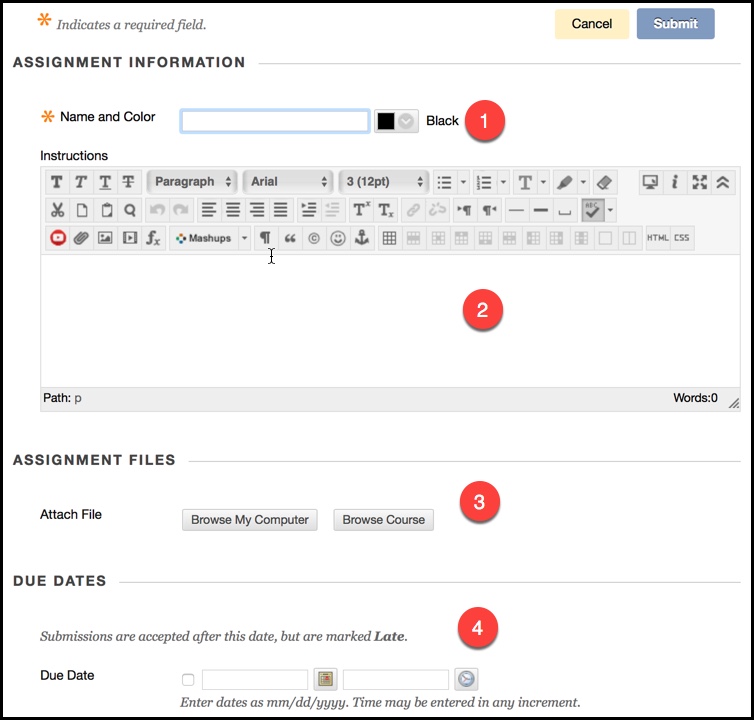
- Provide a Name for the assignment. Optionally, select a new color for the name or keep the color as Black.
- Type Instructions for the assignment and format the text with the text editor tools.
- Optionally, attach a file using the Browse My Computer button.
- Optionally, include a Due Date and Time by using the provided calendar and clock icons.
Select Grading options:
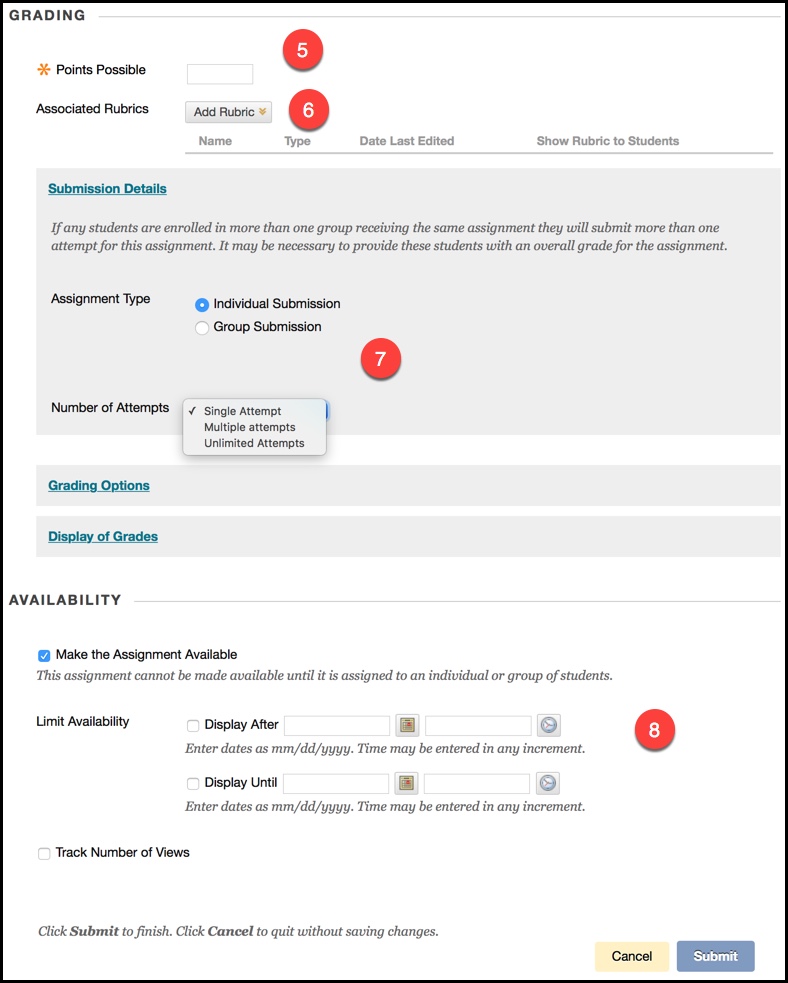
- Add a number for Points Possible.
- Optionally, attach an existing rubric or create a new one using the Add Rubric option.
- Select the Recipients option for All Students Individually or Groups of Students. If Groups of Students are selected as the recipients, a link to the assignment appears automatically on the Group Homepage and in the Content Area where it was created. Only the intended group members are able to see it in the Content Area. Also, Select the option for Number of Attempts, if needed. If more than one attempt is applied, adjust the grading options by using the Score Attempts Using option, which will appear when Unlimited or Multiple attempts is selected.
- Select dates for Availability. Click on the Checkbox next to Display After and Display Until in order to have the assignment viewable to the students. If a date is used for Display Until, the students will not be able to see the assignment after the date that is used for Display Until. Make sure the checkbox Make the Assignment Available is selected. If this box is not checked, the students will not be able to see the assignment.
Click the Submit to finish.